유니티에서 OpenGL을 이용해서 라인을 그리는 예제 입니다 .
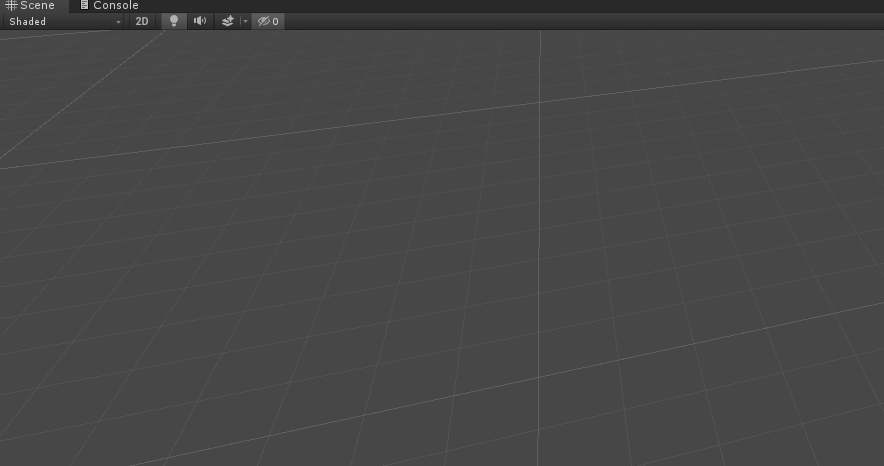
유니티 에디터의 Scene에서도 바닥에 격자들이 기본적으로 보이는 것과 같이
Game 화면에서도 격자를 구현해야 할 때가 있습니다.
라인렌더러를 써도 되지만 간단하게 Script에서 OpenGL을 이용해서 구현하는 법을 알아 보겠습니다.
|
1
2
3
4
5
6
7
8
9
10
11
12
13
14
15
16
17
18
19
20
21
|
using UnityEngine;
public class SimpleGrid : MonoBehaviour
{
public enum Direction
{
DirX,
DirY,
DirZ,
}
public Direction MyDirection;
public int Row;
public int Col;
public Color LineColor;
static Material lineMaterial;
}
|
cs |
SimpleGrid Class의 Memeber 변수들 먼저 보겠습니다.
Direction :
어떤 축으로 그릴지 Inspector에서 설정할 수 있도록 Enum 타입으로 Direction을 정의하고 멤버 변수로 선언해주었습니다.
Row, Col
가로 세로 라인의 수를 Inspector에서 정의할 수 있도록 멤버 변수를 만들어 주었습니다.
LineColor
Line Color 역시 Inspector에서 변경할 수 있도록 퍼블릭 타입으로 선언을 해주었습니다.
LineMaterial
마지막으로 Line에 Material을 입혀주기 위해서 멤버 변수로 선언을 해 놨습니다.
Material을 script에서 생성하기 한 메서드 입니다.
|
1
2
3
4
5
6
7
8
9
10
11
12
13
|
static void CreateLineMaterial()
{
if (!lineMaterial)
{
Shader shader = Shader.Find("Hidden/Internal-Colored");
lineMaterial = new Material(shader);
lineMaterial.hideFlags = HideFlags.HideAndDontSave;
lineMaterial.SetInt("_SrcBlend", (int)UnityEngine.Rendering.BlendMode.SrcAlpha);
lineMaterial.SetInt("_DstBlend", (int)UnityEngine.Rendering.BlendMode.OneMinusSrcAlpha);
lineMaterial.SetInt("_Cull", (int)UnityEngine.Rendering.CullMode.Off);
lineMaterial.SetInt("_ZWrite", 0);
}
}
|
cs |
material 만드는 코드는 https://docs.unity3d.com/ScriptReference/Material.SetPass.html 여기에서 참고 하였습니다.
여기서 부터 본격적인 그리는 부분 입니다.
|
1
2
3
4
5
6
7
8
9
10
11
12
13
14
15
16
17
18
19
20
21
22
23
24
25
26
27
28
29
30
31
32
33
34
35
36
37
38
39
40
41
42
43
44
45
46
47
48
49
50
51
52
53
54
55
56
57
58
59
60
61
62
63
64
65
66
67
68
69
70
71
72
73
74
75
76
77
78
79
80
|
private Color GetAlphaDistance(int i)
{
double alpha = 1f;
if (i < 0)
i = i * -1;
if (i == 0)
alpha = 1f;
double temp = (double)i / (double)Row;
alpha = temp * 100f;
alpha = 1 - (alpha / 100);
if (alpha > 0.8)
alpha = 0.8f;
return new Color(LineColor.r, LineColor.g, LineColor.b, (float)alpha);
}
void DrawGrid(int row, int col, Direction direction)
{
GL.Begin(GL.LINES);
GL.Color(LineColor);
if (direction == Direction.DirX)
{
// row
for (int i = -row; i <= row; i++)
{
GL.Color(GetAlphaDistance(i));
GL.Vertex3((float)-row, 0, (float)i);
GL.Vertex3((float)row, 0, (float)i);
}
// col
for (int i = -col; i <= col; i++)
{
GL.Color(GetAlphaDistance(i));
GL.Vertex3((float)i, 0, (float)-col);
GL.Vertex3((float)i, 0, (float)col);
}
}
else if (direction == Direction.DirY)
{
// row
for (int i = -row; i <= row; i++)
{
GL.Color(GetAlphaDistance(i));
GL.Vertex3((float)-row, (float)i, 0);
GL.Vertex3((float)row, (float)i, 0);
}
// col
for (int i = -col; i <= col; i++)
{
GL.Color(GetAlphaDistance(i));
GL.Vertex3((float)i, (float)-col,0);
GL.Vertex3((float)i, (float)col, 0);
}
}
else if (direction == Direction.DirZ)
{
// row
for (int i = -row; i <= row; i++)
{
GL.Color(GetAlphaDistance(i));
GL.Vertex3(0, (float)-row, (float)i);
GL.Vertex3(0, (float)row, (float)i);
}
// col
for (int i = -col; i <= col; i++)
{
GL.Color(GetAlphaDistance(i));
GL.Vertex3(0, (float)i, (float)-col);
GL.Vertex3(0, (float)i, (float)col);
}
}
GL.End();
}
|
cs |
코드는 길지만 자세히 살펴보면 아주 심플한 코드 입니다.
DrawGrid 함수에서는 현재 선택한 축에서
Row 와 Col 만큼 라인을 하나씩 그리게 됩니다.
라인만 그리면 심심하니 선의 외각 으로 갈 수록 선의 색을 점점 연하게 하면 어떨까 해서
GetAlphaDistance라는 함수를 만들어서 alpha값에 변화를 줘 봤습니다.
자 그럼 이제 격자를 그리기 위한 준비는 모두 끝났습니다.
이제 Update 함수에서 그리면 될까요?
https://docs.unity3d.com/Manual/ExecutionOrder.html
Unity - Manual: Order of Execution for Event Functions
Understanding Automatic Memory Management Order of Execution for Event Functions Running a Unity script executes a number of event functions in a predetermined order. This page describes those event functions and explains how they fit into the execution se
docs.unity3d.com
Unity documentation을 보니 해답이 여기 있었네요.
GL로 그리기 위한 코드는 OnRenderObject에 하라고 써 있습니다.
실제로 Update에서 테스트 해보시면 아무것도 그려지지 않습니다.
|
1
2
3
4
5
6
7
8
9
10
11
12
13
14
15
16
17
18
19
20
21
22
23
24
25
|
private void OnRenderObject()
{
if (Camera.current.name != "Main Camera")
return;
CreateLineMaterial();
lineMaterial.SetPass(0);
GL.PushMatrix();
if (MyDirection == Direction.DirX)
{
DrawGrid(Row, Col, Direction.DirX);
}
else if (MyDirection == Direction.DirY)
{
DrawGrid(Row, Col, Direction.DirY);
}
else if (MyDirection == Direction.DirZ)
{
DrawGrid(Row, Col, Direction.DirZ);
}
GL.PopMatrix();
}
|
cs |
첫 번째 줄 부터
Main Camera가 아니면 그리지 말라는 조건식이 입니다.
Material을 Create 하고 첫 번째 Shader 패스를 활성화 합니다.
그 다음은 GL의 그리기 코드 입니다.
실제로 Main Camera에만 그리는 지 확인해 보기 위해서 Camera를 하나 더 만들어 주고 viewport Rect를 다음과 같이 설정해 주었습니다.
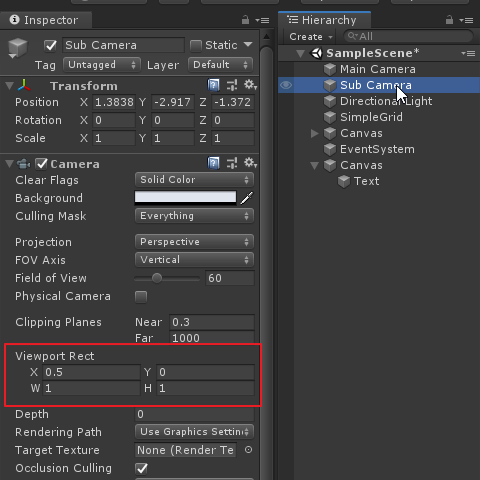

자 이제 모두 완성되었고 실행해 보겠습니다.

row, col 은 각각 10개씩 설정하고 색은 녹색, 축은 X로 지정했습니다.

의도한대로 Main Camera에만 격자가 그려 졌습니다.
github 링크
https://github.com/Helloezzi/unity_opengl_grid
Helloezzi/unity_opengl_grid
Contribute to Helloezzi/unity_opengl_grid development by creating an account on GitHub.
github.com
'Programing > Unity' 카테고리의 다른 글
| Multi Threading in unity (0) | 2020.02.16 |
|---|---|
| Unity Error CS0246 (0) | 2017.11.08 |